Introduction
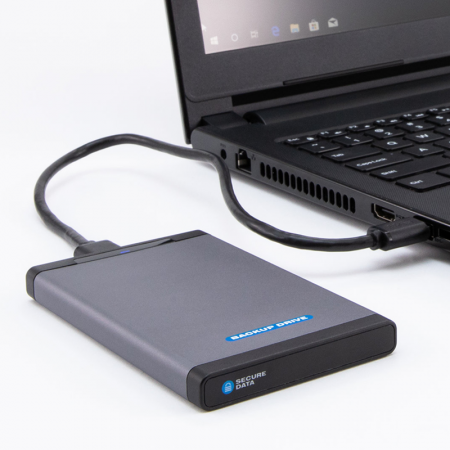
One of the most critical roles that any Systems Administrator must perform on a regular basis is that of running backups for an organization. These days, most big and medium sized offices use Network Attached Storage servers to quickly perform backups on their networks. However, for small offices with limited IT budgets, a DIY solution which uses a simple USB external hard drive is a viable option.
In this setup, the resident “IT guy” is assigned the task of backing up data. This could be from a handful of desktops/laptops, or a central backup server. However, the problem with this setup is that they often will forget to plug in the disk or even initiate the manual backup process, leading to a very unreliable backup scheme.
In this article, I will guide you on how to set up a cheaper, reliable and automated backup scheme. All the operator has to do is to plug in the USB external hard disk any time, and the backup process commences immediately.
This solution takes advantage of a bash script that is triggered once the USB hard disk is inserted into the computer desktop or laptop’s USB ports. The trigger mechanism is handled by udev rules via a systemd unit as will be shown below.
Prerequisites
Operating system: Linux
Desktop: GNOME – mainly for notification purposes
Username: erica (Must have permissions to run ‘sudo’)
Data: /home
Partition is NOT encrypted. See ‘cryptsetup’ tool
Create the following backup script. Save it and make it executable:
vim /opt/backup_2_usb_disk.sh
chmod 755 /opt/backup_2_usb_disk.sh
#!/bin/sh
# Variables
NORMALUSER=erica
VOLUMENAME=BACKUP
USB_DISK_PARTITION=$USB_DISK_PARTITION1
MOUNTPOINT=/run/media/$NORMALUSER/$VOLUMENAME
RSYNC_OPTIONS="-aAXvH”
# Excludes 4 /home
EXCLUDE_FILE_4_HOME_DIR=/tmp/exclude_dirs_in_home_dir
EXCLUDE_DIRECTORIES_IN_HOME_DIR="Videos"
NOTIFY_CMD=/usr/bin/notify-send
NOTIFY_ICON=/usr/share/icons/gnome/scalable/devices/media-zip-symbolic.svg
NOTIFY_TITLE=""


# Functions
notice () {
su -l $NORMALUSER -c "$NOTIFY_CMD -i $NOTIFY_ICON $NOTIFY_TITLE '$@'"
}

disable_automount () {
su -l $NORMALUSER -c "dbus-launch gsettings set org.gnome.desktop.media-handling automount false"
su -l $NORMALUSER -c "dbus-launch gsettings set org.gnome.desktop.media-handling autorun-never true"
}

sync_data () {
sudo rsync $RSYNC_OPTIONS --delete "$1" "$2"
}

mount_partition () {
# Create mountpoint if it does not exist
[ -d $MOUNTPOINT ] || mkdir -p $MOUNTPOINT
# Mount drive
mount $USB_DISK_PARTITION $MOUNTPOINT
STATUS_MOUNT=$?
if [ "$STATUS_MOUNT" != "0" ];
then
notice "ERROR: mount $USB_DISK_PARTITION $MOUNTPOINT failed"
exit 1
fi
}

backup_thinkpad () {
# Create backupdir directory
[ -d $MOUNTPOINT ] || mkdir $MOUNTPOINT

# Start of backup
notice "Backup Started"

# /home
echo $EXCLUDE_DIRECTORIES_IN_HOME_DIR | tr " " "\n" > $EXCLUDE_FILE_4_HOME_DIR
sleep 3
rsync $RSYNC_OPTIONS --delete --exclude-from=$EXCLUDE_FILE_4_HOME_DIR /home/ $MOUNTPOINT/home/
rm -f $EXCLUDE_FILE_4_HOME_DIR

# other partitions
}

umount_partition () {
umount $USB_DISK_PARTITION
STATUS_UMOUNT=$?
if [ "$STATUS_UMOUNT" != "0" ];
then
notice "ERROR: umount $USB_DISK_PARTITION failed"
exit 1
fi
}

enable_automount () {
su -l $NORMALUSER -c "dbus-launch gsettings set org.gnome.desktop.media-handling automount true"
su -l $NORMALUSER -c "dbus-launch gsettings set org.gnome.desktop.media-handling autorun-never false"
}


# Process the following routines
disable_automount
mount_partition
backup_thinkpad
umount_partition
enable_automount

# Notice of completion
sleep 10
notice "Backup completed successfully"
Start/Stop service
Create the systemd unit file:
/etc/systemd/system/backup-usb-disk.service and add the following:
[Unit]
Description=USB Portable Drive

[Service]
User=root
Type=oneshot
Environment=DISPLAY=:0
ExecStart=/opt/backup_2_usb_disk.sh

[Install]
WantedBy=multi-user.target
NOTES:
Reload systemd daemon i.e. ‘systemctl –system daemon-reload’
It is not necessary to enable or start the above unit at this time
since that will be done by the udev rule below.
UDEV rules
Create the udev rules file: /etc/udev/rules.d/97-backup-usb-disk.rules and add the following:
ACTION=="add", ATTRS{idVendor}=="0bc2", ATTRS{idProduct}=="2400", SYMLINK+="disk/by-id/$env{ID_NAME}_$env{ID_SERIAL}", RUN+="/usr/bin/systemctl start backup-usb-disk.service"

ACTION=="remove", ATTRS{idVendor}=="0bc2", ATTRS{idProduct}=="2400", RUN+="/usr/bin/systemctl stop backup-usb-disk.service"
NOTES:
To find your USB disk Vendor and Product ID, run the command:
udevadm info -a -p $(udevadm info -q path -n /dev/sdX) | grep -B2 -i -e idvendor -e idproduct
Change ‘X’ to suit your setup
Run the command ‘udevadm control –reload’ to reload the rules
Conclusion
That’s it! Now when ever, the USB external disk is plugged into the USB port, the backup script will be triggered. You can extend the above mentioned backup script to not only back up other partitions beyond just the /home in our example, but also email the operator whenever the process completes.

